How To Test Electrical Wires: A Comprehensive Guide For Beginners
So, you've decided to dive into the world of electrical wiring, huh? Whether you're a DIY enthusiast or just trying to troubleshoot a problem at home, knowing how to test electrical wires is an essential skill. It’s not as scary as it sounds, but it’s super important to get it right. Testing electrical wires ensures safety and helps you avoid those pesky—and potentially dangerous—electrical mishaps. Let’s break it down step by step so you can feel confident tackling this task.
Imagine this: you’re in the middle of a home improvement project, and suddenly, something goes wrong with the wiring. Panic sets in, but wait—you’ve got this! Testing electrical wires is one of those skills that empowers you to take control of your space. Plus, it’s a great way to save money by avoiding unnecessary calls to the electrician. Who doesn’t love saving a buck or two, right?
Now, before we jump into the nitty-gritty, let’s talk about why testing electrical wires matters. Electrical safety isn’t just a buzzword; it’s a necessity. Faulty wiring can lead to fires, electrical shocks, and all sorts of other not-so-fun stuff. By learning how to test electrical wires properly, you’re not only protecting yourself but also ensuring the safety of everyone around you. So, buckle up, and let’s get started!
Read also:Luke Perry A Tribute To The Iconic Actor Who Left A Lasting Legacy
Why Testing Electrical Wires is Crucial
Testing electrical wires might seem like a chore, but trust me, it’s one of the most important things you can do when dealing with electricity. Think about it: electricity powers pretty much everything in your life—your lights, your appliances, even your phone charger. If something goes wrong with the wiring, it can disrupt your entire day—or worse, put you in danger.
Here’s the deal: faulty wiring is one of the leading causes of house fires. Yikes, right? By testing electrical wires regularly, you can catch potential problems before they escalate into something catastrophic. Plus, it helps you identify whether the wires are live or dead, which is crucial when working on any electrical project.
Let’s talk numbers for a second. According to the National Fire Protection Association (NFPA), electrical failures or malfunctions were involved in an estimated 44,400 home structure fires in 2020. That’s a lot of fires that could’ve been prevented with proper testing and maintenance. So, yeah, testing electrical wires isn’t just a good idea—it’s a necessity.
Tools You’ll Need for Testing Electrical Wires
Before you start testing electrical wires, you’ll need the right tools. Don’t worry; you don’t have to break the bank to get everything you need. Most of these tools are pretty affordable and will last you a long time. Here’s a quick rundown of what you’ll need:
- Multimeter: This is your go-to tool for testing electrical wires. It measures voltage, current, and resistance, making it super versatile.
- Non-Contact Voltage Tester: This nifty little gadget lets you detect voltage without actually touching the wires. It’s great for quick checks and ensuring safety.
- Screwdrivers: You’ll need both flathead and Phillips screwdrivers to open up electrical boxes and access the wires.
- Wire Strippers: These are essential for stripping insulation off wires without damaging the metal inside.
- Insulated Gloves: Safety first, folks! Insulated gloves protect you from electrical shocks while you’re working.
Having the right tools makes the job a whole lot easier—and safer. Plus, it gives you that professional vibe, even if you’re just a beginner. So, invest in quality tools, and you’ll be good to go.
Step-by-Step Guide to Testing Electrical Wires
Step 1: Turn Off the Power
Okay, listen up—this is the most important step. Before you touch any wires, make sure the power is turned off at the circuit breaker. Safety should always come first. You don’t want to end up with a shocking surprise, literally.
Read also:Exploring The Impact Of The Kelce Brothers Podcast A Deep Dive Into Their Journey
Step 2: Use a Non-Contact Voltage Tester
Once you’ve turned off the power, use a non-contact voltage tester to double-check that the wires are indeed dead. Simply hold the tester near the wires, and if it lights up or beeps, that means there’s still voltage running through them. If it doesn’t react, you’re good to proceed.
Step 3: Set Up Your Multimeter
Now, grab your multimeter and set it to the appropriate setting. If you’re testing for voltage, set it to volts. For resistance, set it to ohms. Make sure you understand what each setting does so you can get accurate readings.
Step 4: Test the Wires
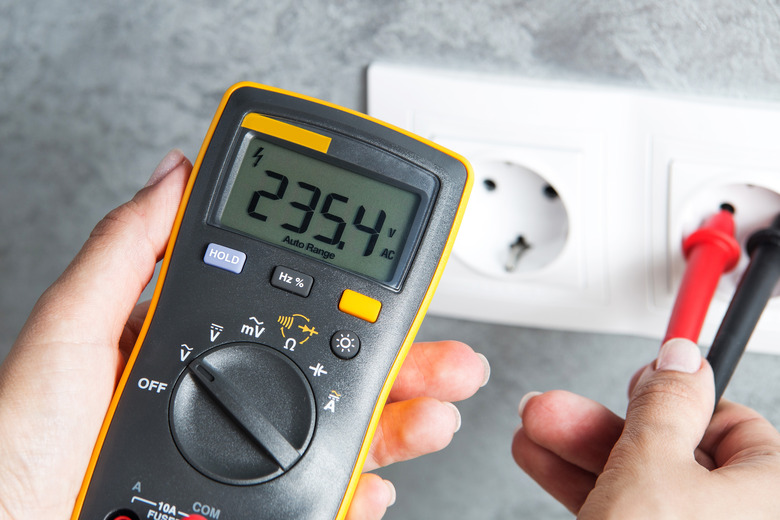
With your multimeter ready, touch the probes to the wires you want to test. For voltage testing, place one probe on the hot wire (usually black or red) and the other on the neutral wire (usually white). If the multimeter reads zero, the wire is dead. If it shows a number, that’s the voltage running through the wire.
Step 5: Interpret the Results
Once you’ve tested the wires, take a moment to interpret the results. If the voltage reading is what you expected, great! If it’s too high or too low, there might be an issue with the wiring. Similarly, if the resistance reading is off, it could indicate a problem with the circuit.
Common Mistakes to Avoid
Testing electrical wires might seem straightforward, but there are a few common mistakes that even seasoned pros can make. Here are some things to watch out for:
- Forgetting to turn off the power: This is a big no-no. Always double-check that the circuit breaker is off before you start working.
- Using damaged tools: If your multimeter or voltage tester is faulty, it could give you inaccurate readings. Regularly check your tools to ensure they’re in good condition.
- Not wearing insulated gloves: Even if you’ve turned off the power, it’s always a good idea to wear insulated gloves. Better safe than sorry, right?
- Skipping the non-contact voltage test: Just because you turned off the power doesn’t mean the wires are completely dead. Always use a non-contact voltage tester to be sure.
Avoiding these mistakes will save you a lot of headaches—and potentially a trip to the ER. So, take your time, follow the steps carefully, and you’ll be golden.
Understanding Electrical Wiring Basics
Before you start testing electrical wires, it’s helpful to have a basic understanding of how they work. Electrical wiring is like the nervous system of your home. It carries electricity from the main power source to all the outlets, switches, and appliances in your house.
There are three main types of wires you’ll encounter:
- Hot Wires: These carry electricity from the power source to the device. They’re usually black or red.
- Neutral Wires: These complete the circuit by carrying electricity back to the power source. They’re usually white.
- Ground Wires: These provide a safe path for electricity to flow in case of a fault. They’re usually bare copper or green.
Understanding the function of each wire will help you test them more effectively. Plus, it’ll make you feel like a total electrical wizard.
Troubleshooting Common Electrical Problems
Now that you know how to test electrical wires, let’s talk about some common electrical problems and how to fix them:
Problem 1: No Power to an Outlet
If an outlet isn’t working, the first thing to do is test the wires connected to it. Use your multimeter to check for voltage. If there’s no voltage, the problem might be with the circuit breaker or the wiring itself.
Problem 2: Flickering Lights
Flickering lights can be caused by loose connections or faulty wiring. Test the wires connected to the light fixture to see if there’s a problem. If the issue persists, it might be time to call in a professional.
Problem 3: Tripped Circuit Breaker
A tripped circuit breaker usually indicates an overload or a short circuit. Test the wires in the affected circuit to identify the problem. Once you’ve found the issue, you can reset the breaker and restore power.
Safety Tips for Beginners
Safety should always be your top priority when working with electricity. Here are some tips to keep you safe while testing electrical wires:
- Always turn off the power at the circuit breaker before working on any electrical project.
- Use insulated tools and wear insulated gloves to protect yourself from electrical shocks.
- Double-check your work with a non-contact voltage tester to ensure the wires are dead.
- Never work on live wires unless you’re a certified electrician.
By following these safety tips, you’ll minimize the risk of accidents and ensure a safe working environment.
How to Choose the Right Multimeter
Not all multimeters are created equal. When choosing a multimeter for testing electrical wires, consider the following:
- Accuracy: Look for a multimeter with high accuracy to get precise readings.
- Features: Some multimeters come with additional features like auto-ranging and backlight displays, which can be helpful for beginners.
- Durability: Make sure the multimeter is built to last. You don’t want it breaking on you halfway through a project.
- Price: There’s no need to break the bank. A mid-range multimeter will usually do the job just fine.
Investing in a good multimeter will make your life a whole lot easier—and safer.
Final Thoughts and Call to Action
Testing electrical wires might seem intimidating at first, but with the right tools and knowledge, it’s a skill anyone can master. By following the steps outlined in this guide, you’ll be able to test electrical wires safely and effectively. Remember, safety always comes first, so take your time and don’t rush the process.
Now that you’ve learned how to test electrical wires, why not put your new skills to the test? Whether it’s troubleshooting a problem at home or tackling a DIY project, the possibilities are endless. And don’t forget to share this guide with your friends and family. Who knows? You might just inspire someone else to take control of their electrical destiny.
So, what are you waiting for? Grab your tools, and let’s get to work!
Table of Contents
- Why Testing Electrical Wires is Crucial
- Tools You’ll Need for Testing Electrical Wires
- Step-by-Step Guide to Testing Electrical Wires
- Common Mistakes to Avoid
- Understanding Electrical Wiring Basics
- Troubleshooting Common Electrical Problems
- Safety Tips for Beginners
- How to Choose the Right Multimeter
- Final Thoughts and Call to Action


